I might be a little late to the party, but I’ve started a love affair with Chuck Taylors. They’re an absolute classic, and I doubt they’ll ever go out of style. But unfortunately, when it comes to Chucks, your color choices are restricted by price. Since my school’s colors are orange and blue, I’ve been wanting a bright orange pair for a while, but the neon orange they stock isn’t what I’m looking for, and I’m not willing to pay $75 for a custom pair… So what’s a girl to do?
Do it herself, of course. So I dyed my own, and they turned out incredibly well! So, for the benefit of anyone else out there who’s longing for a custom-colored pair without a custom-colored price, or for anyone who wants to freshen up a pair of canvas shoes, I thought I’d make a post on how I did it – it’s surprisingly easy!
How to Dye Chucks a Custom Color
I decided to look for a pair that was close to the color I wanted, and found this peach pair in my size for less than $20 on eBay.
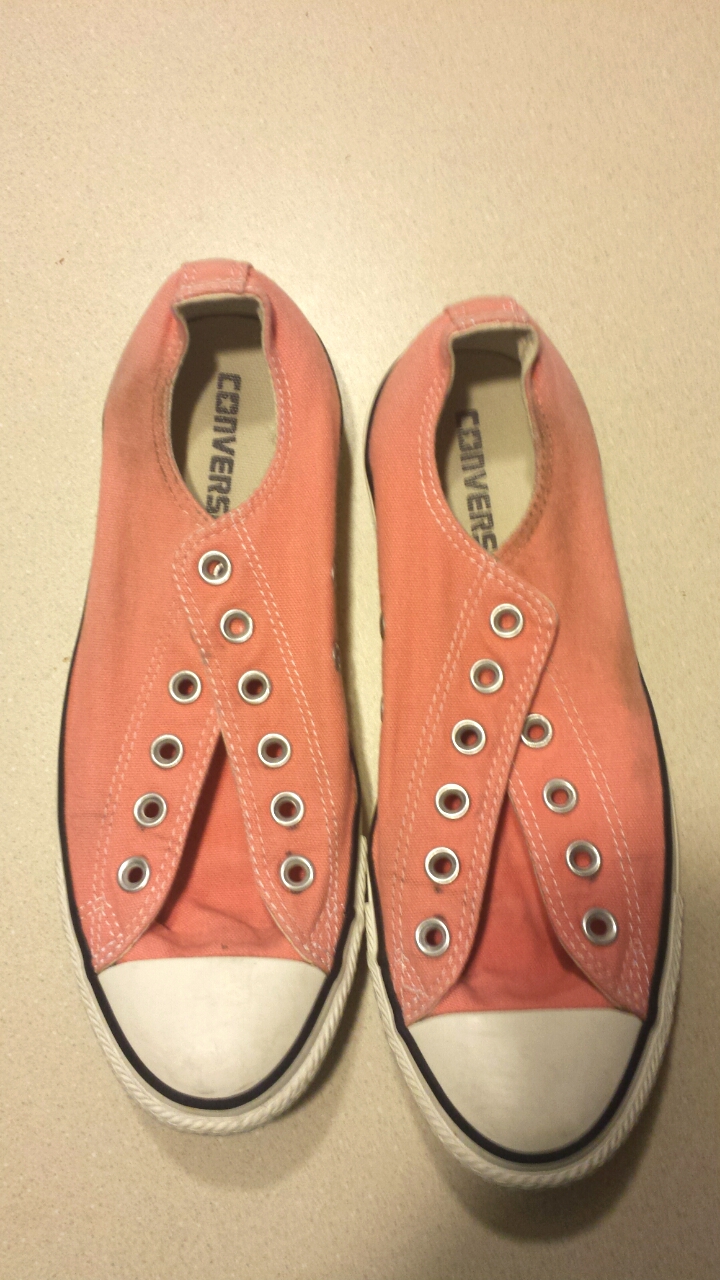
Not the bright Illini orange I was hoping for, but they’ll do for now.
They were pre-worn, so they’re not in perfect condition, but a little laundry detergent and water took care of the few spots on the canvas, and then I was ready to dye!
Once you have your Chucks, you’ll need the other essential ingredient – fabric dye. I chose Rit brand dye in “Tangerine”, which I found at Hobby Lobby for less than $2.50. There are plenty of brands and colors available, and I’m sure you could mix them, if needed. Luckily, the color I chose was pretty much perfect, so I was ready to start dyeing!
What You’ll Need to Dye
Your exact supplies might be a little different, depending on what your dye requires, but my must-haves list is:
- Chuck Taylors, or another type of canvas shoe – preferably in a light color or one close to your target color
- Powder or liquid fabric dye
- A bowl or large cup to mix your dye in
- A bucket to dye in
- Laundry detergent
- Salt
I’d also recommend having at least some of the following on-hand:
- Bleach pen
- Petroleum Jelly (like Vaseline)
- Rubber gloves
First, follow the exact instructions on your brand of dye to mix it up. For mine, I needed to add the powder to two cups of very hot water, and then mix it into my bucket, which I’d filled with warm water, a tablespoon of liquid laundry detergent, and a cup of salt. Just so you know, a cup of salt is a LOT of salt. Like, more salt than you have ever used in one place. So make sure you have plenty on hand before you get started.
Once the dye bath was well mixed, I wet down my shoes with warm water, and then submerged them in the bucket. My bucket was narrow enough that they wedged in nicely, though they seemed inclined to float. I left them in toes-up for ten minutes, then switched them to toes-down for ten minutes, checking consistently to make sure they hadn’t gotten too dark.
The rubber gloves were helpful here, because dye is full of crazy chemicals that I didn’t actually want to touch. And though I have enough school spirit to want orange shoes, orange hands are a bit too much for me. The gloves were definitely a godsend getting the shoes out of the bucket and into the sink. You can see what color they were dyed to, as well – a good, deep orange.
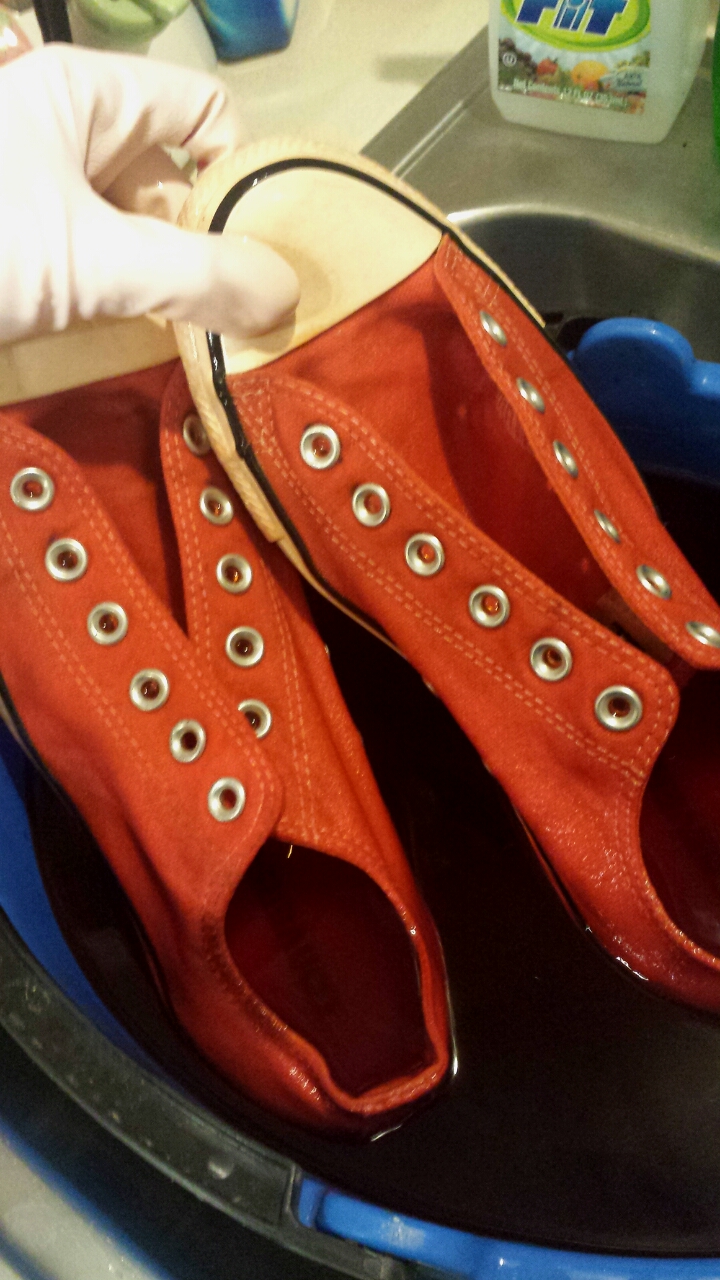
NOW they’re the right shade of orange! There’s a little orange on the rubber soles, too, but that’s easy to fix.
After You Dye
I rinsed my shoes in the sink, first with warm water, and then with cool, until they stopped bleeding dye and the water ran clear. Luckily, I had a metal sink that didn’t stain, but be careful – this is powerful dye, and will stain just about anything it touches, so avoid spills and splatters at all costs, and clean up any messes immediately.
Once my shoes were well-rinsed, I left them to dry overnight. Shoes don’t exactly dry quickly, though, so the next morning I tossed them in the dryer on medium heat for fifteen minutes, which was perfect.
There was one problem, though. The rubber soles had picked up some of the dye and turned dingy off-white, as you can see in the picture. At first, I was terrified – I thought I’d ruined the shoes! But then I remembered my secret weapon: a bleach pen. I spill things constantly, so I always have one on hand. I used the brush end of the pen to coat the all the rubber in bleach, and left it on for ten minutes. When I wiped the bleach off with a wet paper towel, and they were sparkling white again! As long as you’re careful not to get bleach on the fabric of your shoes, this should work for you, too. My roommate, who is far craftier than I, suggested that coating the rubber in petroleum jelly before dyeing might prevent the color-bleed. It certainly couldn’t hurt to try!
Here’s the final product:
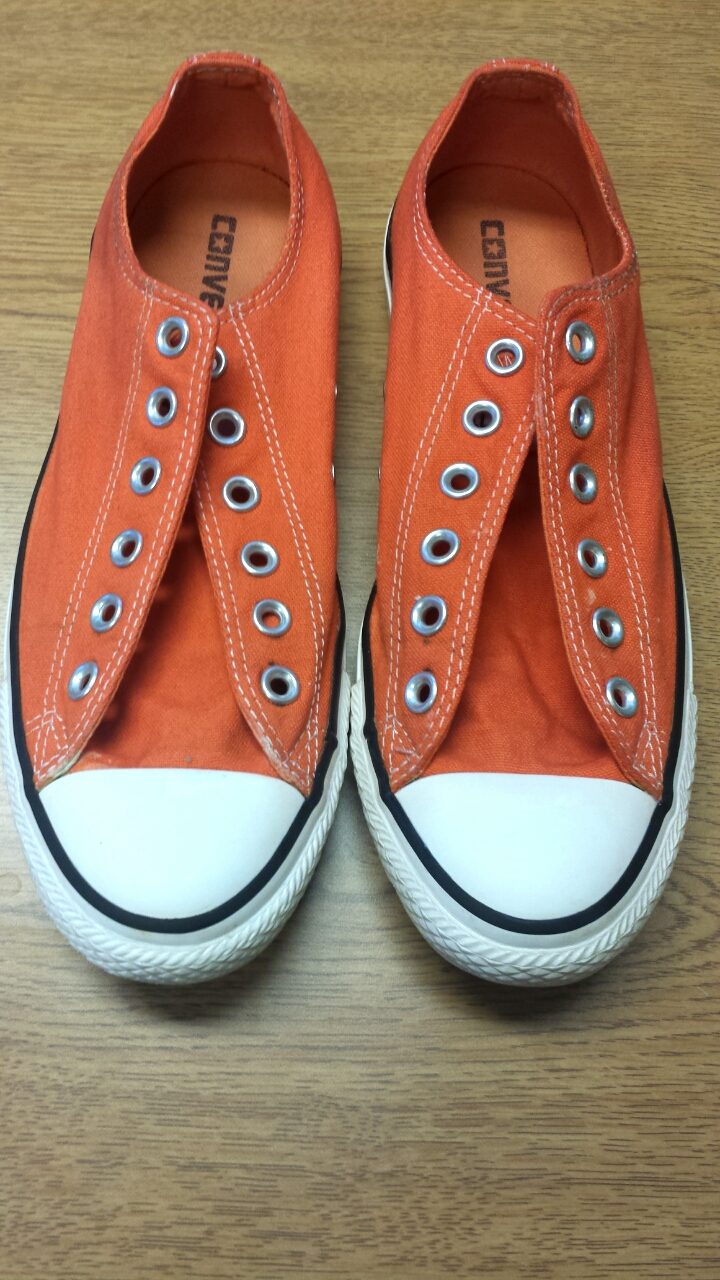
As you can see, the bleach pen restored the shoes’ soles to perfect white, and now I have the bright orange chucks of my dreams!
I’m so happy with how these shoes turned out! They’re perfect Illini orange, and the synthetic thread used on the stitching and “All Star” tag on the tongue mean that all my accents are pristine white. They’ll be perfect for basketball games and days when I’m really feeling my school spirit. So, if you’re looking for a simple way to make the shoes of your dreams, this might just be the DIY for you!


